Some people are incredibly, deeply into automation. They skirt the line between total automation and just-enough automation, and they do it deftly. The end result, when set up properly, is an automation scheme that appears fully natural and allows room for organic engagement in both directions.
One such automation process that would be ideal is to include additional details about a post when you schedule a tweet about that post.
Most automation systems allow you to preconfigure a tweet, but there’s only so much it can do. On a site with one author, this is fine, you can just add in the Twitter handle of that author to the template. What about on a site with multiple authors, however? How can you save yourself the time and effort of double-checking the author’s Twitter account every time you schedule a new tweet?
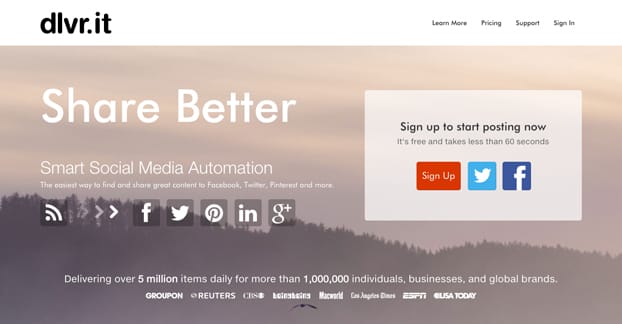
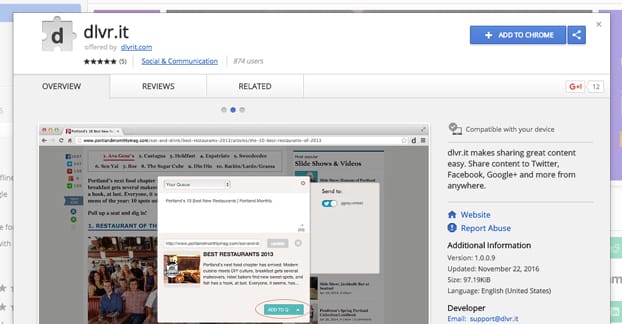
Thankfully, there is a tool you can use for this sort of smart automation, and it’s called Dlvr.it.
What Is Dlvr.it?
Dlvr.it is a “smart social media automation” tool, found at https://dlvrit.com/ these days. They have over a million users, including brands like BoingBoing, Groupon, ESPN, and CBS.”
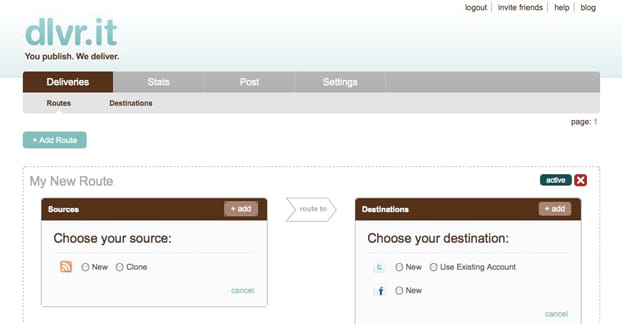
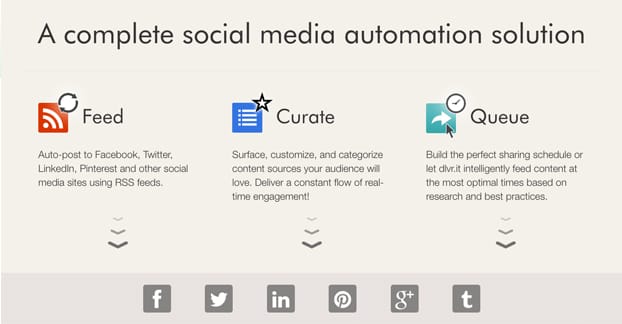
The way it works is pretty simple. It has three possible feed sources, places where it pulls articles to post to your Twitter feed.
- RSS. You can set up your Twitter account to post whenever a new post is made to an RSS feed of your choice. As far as I know, you can plug in any RSS feed, so you could create a Twitter aggregator of several sites you don’t own, and those you do.
- Individual Curation. By using their browser extension, you are able to curate a post as you read it and decide it’s something your users would be interested in reading.
- A Stored Queue. In the same way that you can curate content as you read it, you can also add that content to a queue. Dlvr.it will go through the queue in order, posting it during optimal times on your feeds for ideal engagement.
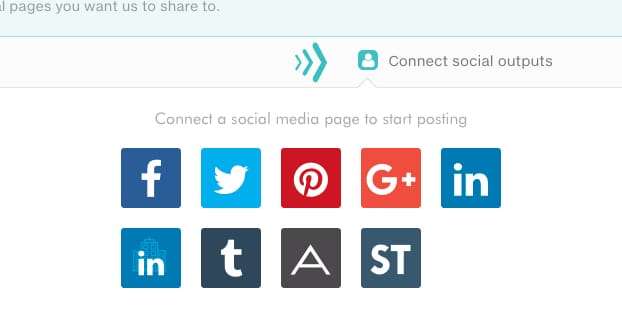
All three of these methods will post to Twitter, as well as Facebook, LinkedIn, Pinterest, Google+, and Tumblr, if you have those profiles set up. All you need to do is authorize the app to use your profiles for posting.
What other features does it have? Boy, are you in for it, asking that.
- Fast response time. The tool constantly scans your sources of content, adding anything it finds to its queue to be posted at the ideal time. It’s a very fast response time, none of that “checks your RSS feed once a day” stuff.
- Allows rich media. You don’t have to limit yourself to just blog posts; you can curate and deliver photos, animated gifs, and even videos through the tool.
- Custom short URLs. You don’t have to run things through bit.ly or some other shortener, or rely on Twitter’s own URL shortening service. You can use the Dlvr.it shortlink instead.
- UTM parameter support. You can configure Dlvr.it to use custom Google UTM parameters for your links, so that whenever they’re posted, shared, or clicked, you can see the results directly in your Google Analytics. This only works with your own sites, of course.
- Contextual hashtags. Gone are the days of having to come up with several hashtags, research them, and find tags that fit the content and have a decent amount of traffic, and manually add them to every post. Dlvr.it has a contextual scanner that identifies specific valuable hashtags from every post and automatically adds them to the tweets and other social posts it makes. The tags are unique to each post, not template-driven, and will almost definitely bring more success to your posts. Note: no contextual engine is 100% perfect, so you may experience the occasional odd tag, but it shouldn’t be out of place even if it’s not perfectly on topic.
- On-The-Go sharing. Using the browser plugins Dlvr.it provides, you can share from anywhere that you have access to a Safari or Chrome browser with the plugin enabled. It’s amazingly convenient for browsing away from your home workstation.
- Optimized timing. Dlvr.it has a timing engine based on market research and general best practices. It’s not as robust as the Buffer timing tool, but it’s quite a bit better than nothing at all, or just some regular feed timer. It looks a lot more organic and will reach more of your audience.
- Performance statistics. No social media tool is complete without some form of analytics, and Dlvr.it is no exception. They have a visual snapshot for every post you make through their service, as well as the engagement it gets.
If all of that sounds amazing, you’re probably starting to ask yourself what it’s going to cost you. That kind of power is probably an expensive tool, right? Well, you’re both right and wrong.
Dlvr.it Free and Paid
Dlvr.it has three different levels of service.
The basic service is completely free, but as you might expect, it’s quite limited. It works for up to three total social platforms or pages. Three Twitter accounts, a Twitter, a Google+, and a Facebook account, or whatever other distribution you want, yours to configure. You can add and remove feeds at your leisure, so long as you don’t exceed three.
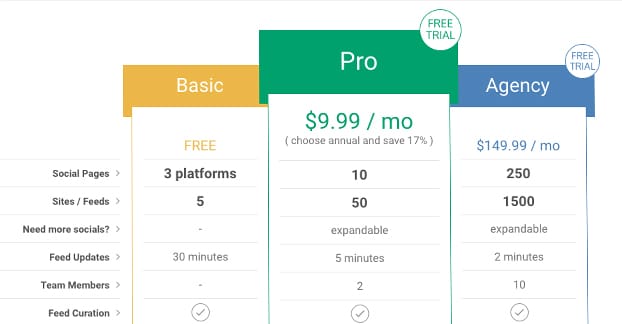
It also limits you to up to five sites or feeds to share content. No more than five RSS feeds, or other passive feeds. I don’t believe this includes your own curated content done manually through the plugin, so you can technically have six, but that’s not saying much.
The free version is not expandable, though. The other two packages can have their higher limits further increase, by ten social pages and 50 feeds at a time, for an additional $8.30 per month. I’ll get to the limits and costs of the other packages in a moment.
The free version checks your RSS feeds or curated content feed for new content once every 30 minutes. The other versions are faster, of course. The free version also does not include team members, so you’re left doing all of the curation and management yourself.
Feed curation, analytics, and the link shortener are all included in the free version. The shortlink works with the Dlvr.it shortlink, Bit.ly if you have an account with them, or most any other shortener you could want to use. Just be aware that some shortlink generators don’t work on some social networks. For example, bit.do has been filtered on Twitter in the past because it was frequently used for malicious links.
Now, you can upgrade from the free plan to the Pro plan, and you get a lot more. Pro will cost you $10 per month, with a discount if you choose annual billing. They up your social pages to 10 by default, and your feeds to 50, both of which can be expanded as I mentioned above. The feed update time is lowered to a mere 5 minutes, and you are allowed to have up to two team members as well.
The further upgraded version is the Agency version, and it’s a steep upgrade. That plan runs you a whopping $150 per month, but it increases your social pages to 250 and your feeds to 1,500. The reason for the huge jump is the modular increases you can buy for $8.30 a pop, which allow you to scale your plan up according to your needs. Additionally, the Agency plan checks for updates every two minutes, and allows ten team members.
Both paid plans have additional features shared between them. To start with, they both have seven-day free trials. They add in the ability to post to Pinterest, which is a tricky API for many apps and thus is usually limited to paid plans. They also gate Twitter inputs behind the paid plan. You can post to Twitter just fine for free, but if you want to pull in content from Twitter, you need to pay. Likewise, an input from RSS is free, but if you want to output to an RSS feed, that will cost you.
Finally, the paid accounts give you the option to repeat posts on a schedule, up to a handful of times for each post, to make sure your most important posts get more visibility. Twitter is naturally resilient to reposts – HootSuite sent the same tweet 44 times once, as an experiment – but you should still limit how much it posts the same few pieces of content, for best practices.
They only mention it in a footnote, but Dlvr.it paid plans are where you get your automatic contextual hashtags, your optimized schedules, and your Instagram connections as well. They also list “attentive support” as a paid feature, so I assume they give priority to paid users over free users when it comes to support.
How You Should Use Dlvr.it
All of that is great, but how should you actually use the tool? First of all, I recommend getting the Pro plan. You probably don’t need to pay for any upgrades, and you certainly don’t need the Agency level plan unless you’re actually an agency, but the expansion of your feed count and the added features of the paid plan are well worth it for a mere $10 a month.
Next, you need to decide where you want it to post. The focus of this post has been on Twitter, but you can use it on other social networks as well. I recommend keeping it to just Twitter to start with, since it’s easier to let automation slide there.
Now you need to set up your sources. An RSS feed for your site is a must, which should be easy to find or set up. If you want to use multiple sites you own, go for it. I wouldn’t recommend uses the RSS of another site, though, since you don’t control how they use it, how they change it, or what they post. For any content stream you don’t own, make sure to use manual curation to make sure you only post what you want to post.
Set up the browser plugin and do your browsing with that browser. Some of you still on Firefox or, for some reason, Edge, might need to switch for this. If you want to add an extra step, you can always just browse with your chosen browser and paste links over to curate later, but that’s adding an extra step and makes you less likely to fully utilize Dlvr.it.
I could write a detailed section on how to actually use the dashboard here, but frankly, I don’t need to. Dlvr.it already has a good guide on their site, and you can find it right here. It should tell you pretty much everything you need to know about the basics of setting up feeds, sources, socials, and curation. Additional features you can look up in their help center or contact their support; as a paid member you have priority, after all.
After you have added a few items to the queue, check both Dlvr.it and your Twitter account to make sure they’re adequately posting. I recommend only adding a few items to the queue early on, to make sure the automatic tagging and contextual hashtags are working the way they’re supposed to. As always, you can take the word of some dude on the internet all you like, but you should always verify with your own experience before you go all-in investing in a tool.
Next, you should go out and get to work curating high quality content. The best Twitter feeds are always more curation and engagement than self-promotion, and using an automation strategy is no different.
As you curate content from around the web, you can go back to your Dlvr.it dashboard and review what you have added to your content stream. From there, you can choose to edit rules about individual posts or sites, you can edit individual posts, and you can remove them or delay them if you decide to do so.


Very thorough, “human” review of this product. Much appreciation for your efforts.