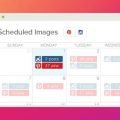
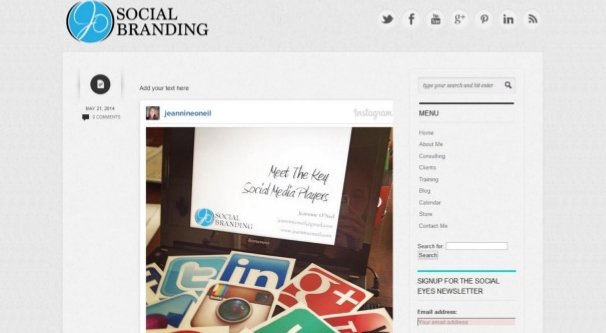
You may have come across a website in the past that includes a block of Instagram posts, usually at the bottom of its homepage. For example, this UK-based photography site has a bar with a bunch of tiled Instagram photos across the bottom of their homepage. If you visit their Instagram feed directly, you can see that it’s their most recent posts, arrayed in a grid. Whenever they post something new, the new photo appears on their website as well.
This is a really cool way to integrate Instagram with your visually-focused website. You show off your recent posts, and you have ready-made links to your Instagram account for anyone to click on to explore.
This kind of setup is engaging and can do a great job of referring your website visitors to your Instagram page. However, it’s actually more complicated to set up than you might think.
The Instagram API
Now, you might be saying to me “why not just use one of the available plugins?” The answer is, generally, “go right ahead.” There are a lot of plugins that give you these feed display options, and I’ll talk about them at the end of this post.
Here’s the problem. Every one of these plugins needs to use the Instagram API to access content and pull the data for an official embed. If you’re not using the API, you need to scrape the page, and scraping the page is generally against the terms of use for a site like Instagram. They don’t want to deal with content thieves and the like, after all.
That’s not to say it doesn’t happen. I’m sure you’ve seen some of the dozens of websites that do nothing but scrape Instagram. Sites like Picdeer, Pictame, and Piknow have an interesting history behind them, so let me digress for a moment.
Years ago, Instagram was solely a mobile platform. There was no way to access it via anything other than the Instagram app directly. That meant desktop platforms were unable to use the site, and it limited business access quite a bit.
Since many people wanted to access Instagram feeds without having to use a mobile device or mobile app, these sites all sprung up. All they did was scrape Instagram posts and display them publicly.
Eventually, Instagram made their network visible to desktops, though you are still limited in some forms of action you can take. You can’t post from a desktop, for the moment, as an example.
None of these sites were officially supported, and none of them used the Instagram API. All they did was scrape content using custom apps. Now, Instagram didn’t like these, and making their platform public helped to combat them. Many died overnight, but some that still exist, like the ones mentioned above, add in some additional features. They might have a different kind of content search, or a way to browse and discover new content, or maybe just a unique way of displaying the content. The point is, they were forced to provide a value-add instead of just scraping content to display.
All this is basically just to illustrate a point. While scraping may technically be against the Instagram terms of service, they haven’t really done a whole lot of prosecuting or otherwise taking action against the sites that do it. Since some of the options I have for you below involve such manual scraping, you can see why it might be a concern.
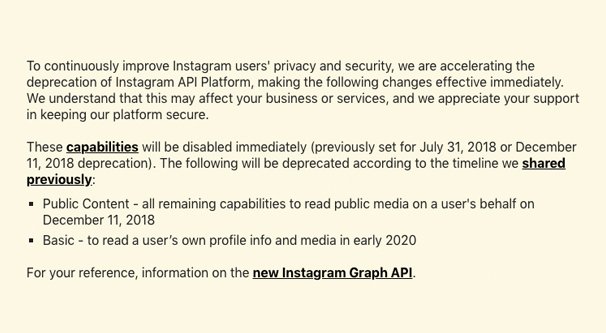
Back to the primary question, though. Why not just use one of these plugins? Well, the Instagram API is a fickle mistress. In fact, as recently as December of 2018, Instagram made a major change to their API and deprecated the older version. See the big disclaimer/warning at the top of this page? That was all the warning brands using the API got.
Now, the plugins you find to display Instagram feeds rely on the Instagram API or on scraping. If Instagram takes action against scrapers, those plugins die. If Instagram dramatically changes their API, those plugins die. Either way, you’re relying on a third party to keep their code adapted to any changes Instagram makes, which can be unreliable.
I’m still going to list some plugins later, because they’ve proven that they keep themselves up to date and that they work even through Instagram changes. However, keep in mind that another solution may work for you instead.
The other reason these plugins might have issues is if they require your API access instead of their own. Some use your API access to get around rate limits; they fetch content with the API access of each individual, rather than one centralized access that can get overwhelmed. The trouble here is if your API access is revoked for one reason or another, you’ll be unable to keep using these plugins.
If you’re still interested in displaying your Instagram content on your website after all that – and you should be, it’s quite useful and really cool – here are your options.
Option 1: Faking It
The first option you have is to fake it with a lot of manual work. It’s not difficult, but it can be time consuming, and it’s something you’ll have to do if you want to keep parity between your Instagram account and your website “embeds”. I put embeds in scare quotes here because they aren’t even technically embeds.
So how does this method work? Well, you’re probably taking photos with a digital camera and editing them on a computer before uploading them to your mobile device to post on Instagram. While you’re editing them, make two copies. One copy will be uploaded to Instagram as normal. The other copy will be uploaded on your web hosting.
When you post the content to Instagram, you create an Instagram post. This has your caption, the permalink, and other information associated with it. Make and publish that post.
Now go to your website and create a grid where you want your Instagram content to be. Upload your photo to your web host and embed it in one of the cells of the grid. Copy the permalink to the Instagram post, and make the photo a link. If you want something that uses a hover script to display your image caption, it will require a bit more coding, but you can copy and paste your caption as well.
There are two major downsides to this option. The first is that it takes time, and it’s something you need to remember to do with each image you post on Instagram. If you forget to upload the image to your website, shift all the images down the grid, and add the new image to the first slot, your feeds will end up looking different.
The second major downside is that it takes up space on your hosting. The benefit of using Instagram API access or scraping is that the images are still hosted on the Facebook CDN, which means they load quickly without needing to take up your own server resources. This fake embed option doesn’t have that benefit.
Option 2: Manual Embeds
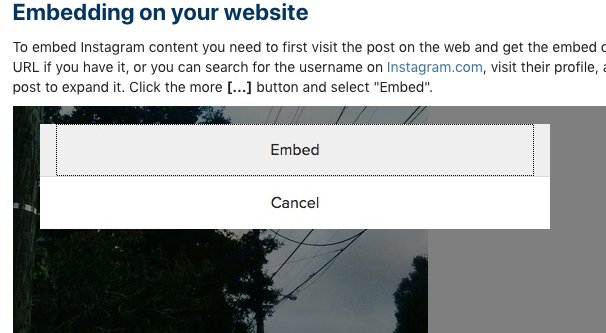
Your second possible option is to use some custom code and manual embeds from Instagram. Every Instagram post has the option to embed it. Click on the post and click the three dots to the upper right of the caption, and one of the options is embed. This copies some lengthy code, and it uses the Instagram API. The primary benefit here is that, despite using the API, it’s a core feature of Instagram and is unlikely to change. When Instagram makes API changes, they make sure their own services are unaffected.
When you embed the post on your own site, it typically appears in full size and with the caption for the post, though you can tell it not to include the caption if you prefer. This obviously isn’t ideal for a small grid of multiple images. In order to display it in this manner, you will need to use some custom code to shrink and position the images.
This is basically a manual, jumping through hoops method of creating a grid in a way that bypasses using a third party plugin. It hosts each post on Instagram, but it requires custom code, and it’s kind of a janky solution. You still need to manually shift your posts down your grid each time you want to add a new one, and you still need to manually fetch the embed code for each one. Plus, adding that many embeds all in the same place might increase your load times significantly. Overall, it’s not really the best option.
Option 3: Using a Third Party Scraper
As I mentioned before, Instagram isn’t necessarily that difficult to scrape. You can use a third party scraper service to present you with data, which you can then format and embed on your site in whatever manner you choose.
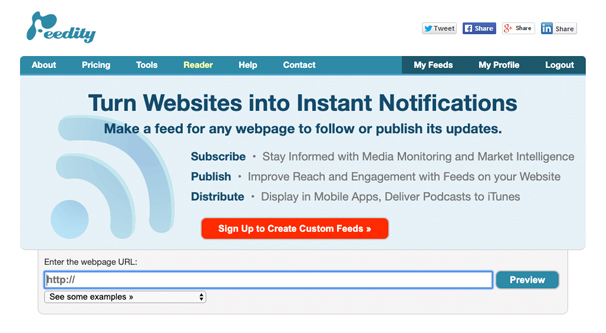
Feedity, for example, is one such third party scraper service. This allows you to load up a webpage in their custom scraper interface and choose which pieces of data you want it to look for and scrape when it changes. Feedity, in this case, specifically formats that data as an RSS feed.
You can then use that RSS feed to embed content on your page. Depending on your site design, you can do this in a few different ways. This is a tutorial for taking an RSS feed and embedding both the content and the images on your site, when your site is using a WordPress architecture. Meanwhile, this tutorial uses simple HTML and PHP coding to do the same thing for a more traditional site design.
This option is slightly less than ideal for a few reasons. First of all, it requires a significant amount of custom coding for your website. If you’re not experienced with coding yourself you’re going to need to hire a developer, which can be expensive.
Additionally, you rely on a third party service to do your scraping for you, and you rely on it working on Instagram – which is tricky – and you rely on Instagram not changing their site design to stymie those exact kinds of scraping attempts. The fact is, Instagram doesn’t like scrapers, and while they don’t really go after them individually, they do make life hard for them.
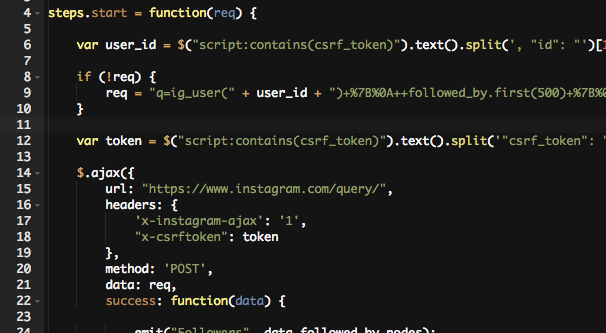
Option 4: Creating a Custom Scraper
Scraping, of course, isn’t all that difficult to set up. It may seem like scraping is hard because of the different scraping solutions out there, but they all try to be “one size fits all” to sell their services as a business. If all you want to do is scrape something on your own, your code is likely to be a lot simpler. You can, then, simply create some code to scrape Instagram once a day or whatever, format the data in whatever way you please, and set up your own custom embeds.
As with some other options, this requires a lot of personal coding or developer time, which isn’t ideal. If you like to code, you can do it yourself, but if you’re not a fan, you’re going to need to pay for a developer. You also have to contend with Instagram changing their site and making it harder to scrape, which will happen every few months with regularity. If you’re willing to contend with this, go for it. Otherwise, consider a different option.
Option 5: Using a Plugin
I know I went over reasons why you shouldn’t use a plugin before, but you can still consider it. Some plugins are good at keeping up with changes, don’t need your API to function, and are trivial to set up.
Consider these choices: EmbedSocial, Juicer, SnapWidget, and Elfsight. These are all options that will accomplish exactly what you want them to with minimal setup. They have their own perks and drawbacks, of course, and some of them aren’t free, but that’s just what you need to look into.