
It’s 2018, almost 2019. I wouldn’t think that adding a line break to a block of text should be a complicated issue. We’re not working with raw HTML here, or .txt files that don’t have word wrap, or anything like that. Even IM clients – the few that are left – support line breaks. And yet here we are, with Instagram eating any line break you try to add if it isn’t added properly.
Why Use Line Breaks?
Line breaks are, more than anything, a convenience of formatting. They allow you to format your text so it doesn’t show up in big blocks, but rather, is spaced out in readable portions. You can use line breaks to make bullet lists, link blocks, or even just a multiple paragraph caption for your photos.
Line breaks can also be used in comments and in your Instagram profile bio. It helps clean up both, particularly if you’re trying to include a lot of information, but it’s tricky to pull off in some cases. Mobile devices in particular always have a variable functionality for the enter key; does it add a space or does it submit what you’re typing? Who knows! Every app is different.
Important note! Instagram will eat line breaks if there is formatting surrounding them. If you put spaces at the end of the last character of the line before the line break, the line break will not appear. A line break with no characters also often won’t appear either. This is why you see so many people using .s for their line breaks. My methods should help you get around that issue.
What I’ve done is considered each platform and each possible means of adding line breaks. Let’s take a look.
Via Computer
If you’re writing a post on a PC or Mac device, a laptop or a desktop computer or even some tablet-laptop hybrids, you’re going to have an easy time. All you need to do is, well, type an enter. You know the key, right? It’s over there to the right of the keyboard, beneath the “\” button and above the shift key.
Except we have a problem: you can’t post via a browser on Instagram. You can write a perfectly formatted caption, but you can’t post that caption from a browser. So, how do we get around this problem? Thankfully, there are a lot of different options available to you.
Option 1: Tricking Instagram. The first thing you can do is simply trick Instagram into thinking you’re using a mobile app. To do this, you need to change your user agent.
A user agent is a string that your browser sends to any web server it contacts. It tells the web server some simple information about you. Don’t worry, it’s nothing personal or identifiable, not really. It basically just mentions what operating system, browser, and code versions you’re running. A user agent might look like this:
- Mozilla/5.0 (Windows NT 6.1; Wind64; rv:47.0) Gecko/20100101 Firefox/47.0
Basically, this is the browser and version, operating system and version, platform, and any relevant extensions necessary for the web server to give you the right data. It’s how a website can tell whether you’re using a desktop or a mobile version of a site and can serve the appropriate version of the page to you. This is a little less necessary these days than it used to be, because responsive design doesn’t need it as much as adaptive or m.mobile sites, but it’s still there and it’s still useful.
Spoofing a user agent is something any browser can do, though you might need a browser extension to do it. Basically, all you’re doing is changing the user agent string you send to the web server.
- Chrome: Click View > Developer > Developer Tools, click the Settings gear, click Overrides, and choose a different user agent or enter one of your own.
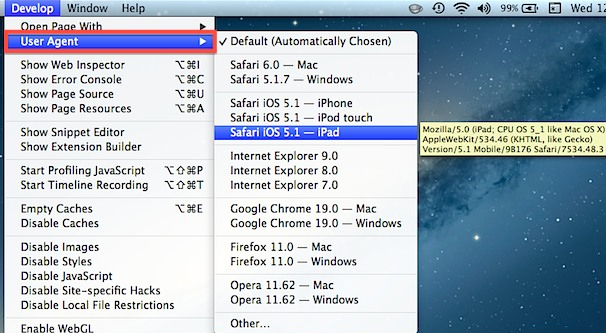
- Safari: Click Preferences and check Show Develop Menu. Then click Develop > User Agent, and choose a different user agent.
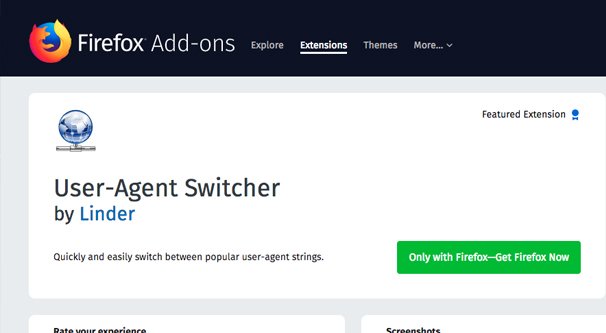
- Firefox: Type about:config in the address bar and accept the warning. Search for Useragent and in the resulting set of options, create a new string. Write general.useragent.override. Double-click the new option and add in a new user agent string, then hit Okay. Disable this string when you want to undo the change. If you don’t want to use the manual method just described, you can download an extension to use instead. Something like User-Agent Switcher should work fine. As always, make sure your extensions are up to date and function properly before you install them.
Once you’re using a mobile device user agent, Instagram will behave as if you’re accessing it via the mobile app, and you should be able to post new photos and write descriptions for them, or at least edit the descriptions of photos you’ve already posted. Of course, it’s possible that by the time you read this, Instagram has fixed this loophole.
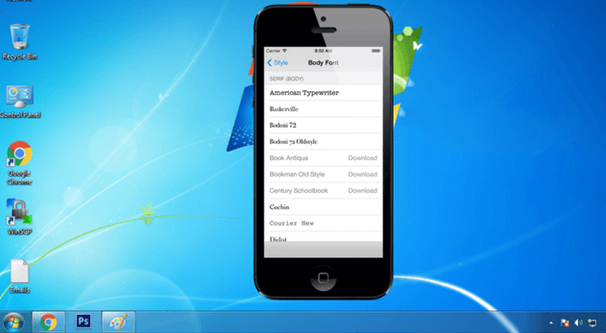
Option 2: Emulation. There are a handful of different phone emulators you can use. Emulators are a more perfect replication of a phone environment, typically creating a virtual machine that runs the mobile operating system with at least limited functionality.
Mobile emulators are used so that people without smartphones can run mobile software on a PC. They’re also used so that a person with, say, an iPhone can run Android-only software locally, or vice versa for an Android and iPhone-only apps. Mostly, though, emulators are used by app developers to replicate mobile devices for app testing and compatibility testing. If you’re developing an app, you want to make sure it works on various devices.
All mobile emulators will work basically the same. You install an emulator, and then through the emulator, load the app file for Instagram’s app. Once Instagram is loaded, you should be able to use it as though you were using a phone, including typing descriptions that include line breaks. Here are a few different emulators you can try out:
- iOS Simulator: This is the official iOS developer tool, and as such, you need a developer login to be able to use it.
- Android Studio: This is the official Android developer studio. It’s a tool and platform for app developers, but it has an emulator attached.
- BlueStacks: This is one of the foremost Android emulators. It’s under active development and is compatible with just about every app.
- ARChon: An open-source Chrome plugin that lets you run Android apps from within Chrome.
There are also a bunch of other options of varying feature levels you can explore. Here’s a decent list.
The process here is pretty simple. Just install the emulator, configure it however it asks to be configured based on whatever mobile device you want to emulate, and install the Instagram app to the emulator. From there, just write posts the way you would want to, using line breaks with the powerful enter key.
Option 3: Marketing Partners. Instagram has added a few platforms as official Marketing Partners. What this means is that these few platforms are third party, PC or Mac-based apps that are allowed to post to Instagram via an API. Up until early 2018, this was not possible, and any app that claimed to be able to do it was just running a phone in the background and manually posting when you wanted a post made. Now, though, official marketing partners are able to post legitimately.

The roster of marketing partners is always changing, with new partners added every so often, with different kinds of feature lists. Check out the official site for marketing partners and see if any of the platforms catch your fancy.
The one downside to this option is that marketing partner platforms are generally not free to use. They’re powerful marketing tools, which means they’re far and away overkill for a casual user just looking to use line breaks. Still, if you want to use them, they’re available for whatever fee they charge.
Via Mobile Device
Whether you’re using an Android or iPhone, a tablet or iPad or whatever other mobile-OS device, you have both an easier and a harder time than desktop users. On the one hand, you don’t need to use any loopholes or emulators just to get Instagram running. All you need to do is install the app, which you almost definitely already have if you’re reading this article. That’s the easier part.
The harder part is the part where actually typing a line break in the mobile app generally doesn’t work. Instagram just eats them, so you need to use a workaround. I’ve compiled a handful of options you can use.
Option 1: Copy and Paste. This article from Schedugram, down in its third option, includes a pair of brackets with a bunch of spaces between them, like [ ]. They tell you to write your caption, then copy and paste that string into your caption and delete the brackets. You’re left with a series of spaces where a line break should be, which will render as a line break when you post it to Instagram.
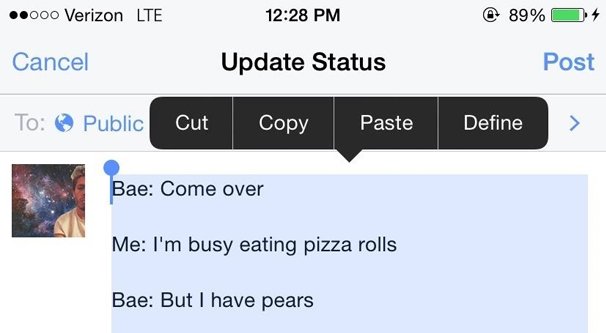
I don’t know what they’re doing here, if this is some code wizardry you’re copying invisibly. I’ve tried copying and pasting myself and it looks like it’s just spaces. Maybe there’s a secret they’re using, I don’t know, but it should work, unless it doesn’t. Remember, a space in the wrong place before the line break will eat the break. Also, it’s hard enough to accurately copy and paste from a mobile device, so I don’t really like this option.
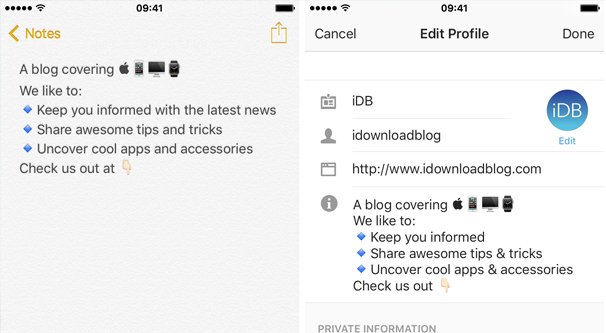
Option 2: Notes. Those of you who have an iPhone are at an advantage here. iPhones all have a Notes app installed by default. It’s called Notes, and it should be easy to find in your app roll. Just open up that app.
In the Notes app, you can write whatever caption you like with whatever formatting you like. This also works for bios and comments. Any text field can use this method, and in fact some people even use it for longer, complex passwords. I don’t recommend that – use an actual password manager – but that’s beside the point.
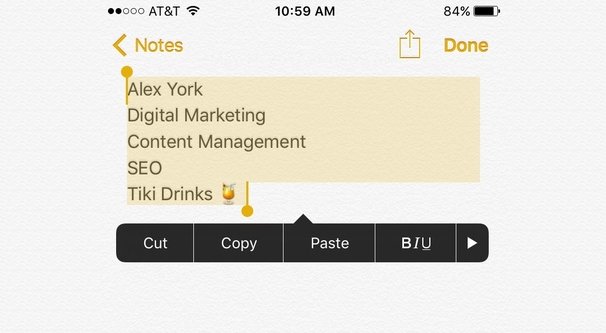
Use the Notes app, write your caption the way you want it to appear, and make sure you don’t have any trailing spaces directly before line breaks. Once you have it formatted the way you want it to look, links and all, highlight the whole thing. Copy it, navigate to the Instagram app where you want to update your bio or write a caption, and paste the text. If you did it right, your version of the text should appear properly.
Android devices don’t have a native note-taking app, which is a bit strange. Thankfully, there are dozens of note-taking apps in the app store available for you to use. Here are some choices you might consider:
- Evernote: One of the foremost note taking apps with excellent sync across devices, but a lot of advanced features gated behind a paywall.
- Google Docs: The official Google Docs integration, a bit annoying to use if you’re a frequent Docs user because it can clutter up your documents folders.
- Zoho Notebook: A simple notebook with sync from Zoho, considered one of the better note taking and productivity apps.
- Standard Notes: A very simple and lightweight note taking app. It lacks a lot of advanced features, but you don’t need those features if all you’re doing is writing Instagram captions.
- Google Keep: Google’s answer to Evernote, with a ton of advanced features and integration with other Google services. Probably one of the better options to try.
In any case, do what you do with iPhone’s Notes app. Write your caption the way you want it, copy it, paste it into Instagram, and hope it works.
Option 3: Web Formatting. As a quick final option, you can also use this service. It’s a very simple web-based text formatter. Write your caption in the box or paste it in from another note system, or even directly from Instagram, and hit Convert. The Convert button formats your caption with line breaks, and automatically copies it to your clipboard when it finishes. Then just go back to Instagram and paste. Your line breaks should be intact.


Or… From your mobile you can just hit the “123” button in the lower lefthand corner to toggle keyboards and use the return key there, while you’re in the post, writing the caption directly in IG. I just found it and it was a life-saver! Might want to include it in your tips…
good one – easy – thanks!
Yeah that doesn’t work anymore.
The ‘Enter’ line break in the 123 alternative keypad worked for me just now – iPhone 5s with the latest OS installed. April 2019
That worked for me! I have an Android. So simple. Thank you.
So when I’ve tried the spaces in Notes, my captions go back to a large block of text on IG. For example: I write my caption like this But then on IG it appears as: I write mycaption like this What gives? I’m using an iPhone 6S and both the phone and app have the most recent software updates. I appreciate any help!
Tip about no space after last character did the trick for me using return in app on iOS. Thanks!