Instagram has long been one of the top platforms to use for engagement, but there’s more to it than that. The site is a hub for young shoppers, many of whom use the network to scout out products they might be interested in buying. Apparel and fashion items are hugely prevalent, ranging from models showing off dresses to makeup tutorials with the products they used listed in their captions.
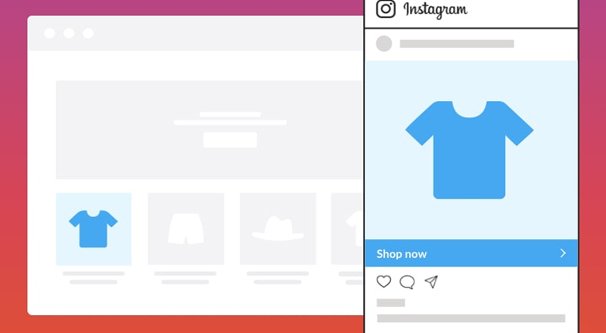
It should come as no surprise that Instagram found a way to monetize this in their favor. Released in 2018 and slowly expanding around the world, Instagram Shopping is a system implemented to allow users to buy products directly through Instagram.
All About Instagram Shopping
That’s right; directly. No links to click, no third party checkout system to go through, Users see a post with products tagged in it, they decide they want one of those products, so they tap on it. Then, from immediately within the Instagram app, they can pay for the product and have it shipped to their doorstep.
Of course, this isn’t always ideal. Instagram implemented this system because it allows them to keep users on Instagram. If you’re a business that typically thrives on pack-ins, upsells, and related product listings, selling through Instagram doesn’t let you capture any of that.
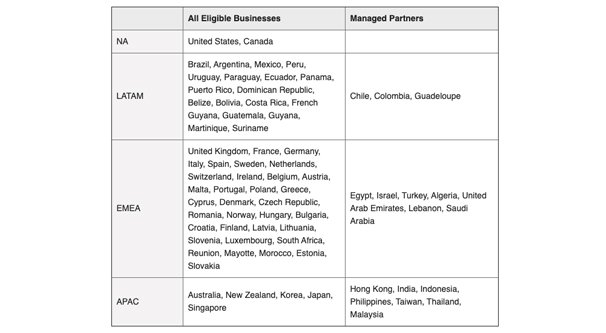
Instagram Shopping is also limited in other ways. It’s primarily only available in North America, specifically the USA and Canada, but is expanding to other countries slowly over time. You can read the full list here.
For an account to be able to use Instagram Shopping, it also has to meet certain requirements. I’ll just quote them, because Facebook/Instagram is pretty succinct with them. Your business must:
- “Comply with our (Instagram’s) merchant agreement and commerce policies.
- Have an Instagram business account. Your Instagram account must be converted into a business account.
- Have a connected Facebook Page. Your Instagram business profile must be connected to a Facebook Page. Facebook Pages with the Message to Buy payment option will need to delete and create a new Shop with another payment option before they can use shopping on Instagram. Please note that country or age restrictions on your Facebook Page will not carry over to your Instagram account.
- Primarily sell physical goods. Your Instagram account must be a business that primarily sells physical goods. We are continuing to test this feature and hope to expand availability to more accounts in the near future.
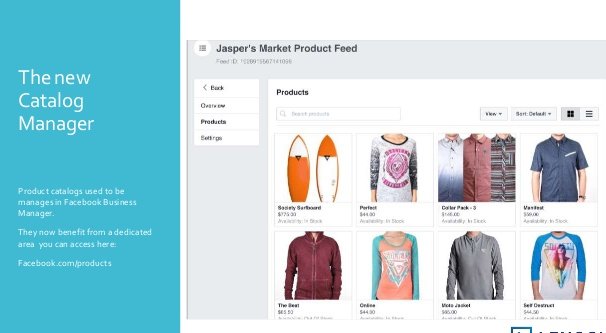
- Have your business account connected to Facebook Catalog. Your business account must be connected to a Facebook catalog. This can be created and managed on Catalog Manager or Business Manager on Facebook, or through Shopify or BigCommerce platforms.”
Of these, the last two are the hardest. Complying with the commerce policies is easy, just don’t sell anything illegal or anything adult-oriented. Oh, it’s more detailed than that, but you should know the gist of these things by now. Likewise, connecting a Facebook Page is trivially easy, though you may not have an active Facebook page if you’ve been a primarily Instagram-focused business.
The restriction to only sell physical goods is annoying. If you sell ebooks, software, digital magazines, music, and other such products, you’re going to have a hard time getting through the Instagram filters. You could, potentially, qualify if you can convince Instagram that you sell mostly physical boxed copies of software, physical books, or actual CDs/records/what have you, but you still might not qualify.
And, of course, you have to use Facebook Catalog. This is where other restrictions come in. You have to upload and sync your product catalog with Facebook Catalog. Basically, what this entails is creating a rich meta database in your site with all of the relevant information for your products – like name and price – tagged with the appropriate meta tags. You give Facebook access to this information and they maintain a product catalog for you.
This whole system is entirely set up just to prevent a disconnect between prices on different platforms. Well, prices and quantities available. It would suck to have one copy of a book left to sell, and have a person buy it on your website at the same moment someone buys it through Instagram. You’d have to either order another copy of the book – and thus delay shipping to one of the recipients – or cancel one of the orders until you get a new copy in. Both options are bad for business.
The same goes for price. If you offer a discount on your website, Facebook doesn’t want its users to have to do all of this price checking and whatnot before buying. They sync prices so your users are guaranteed the accurate price, even on old posts for old products.
Applying to Instagram Shopping
Not just anyone can start using Instagram shopping. You have to apply to use it, which means going through all of the steps to set it up and then asking Instagram if they’ll turn it on for you. Here’s how.
First, make sure you comply with the relevant policies above. Make sure you aren’t in violation of the commerce policies. Make sure your account is a business account and that you have a linked Facebook Page. Remember that linking a Facebook Page and an Instagram account is an official back-end link, not just a text link in your profile or something.
Next, you need to connect your account to a Catalog. There are two ways to do this: through the Facebook Catalog Manager or through an eCommerce platform. More on this in a moment.
Once you have a catalog set up and synced, you need to go into Instagram and sign up to shopping. The relevant option is in the Profile Settings, Business, Shopping menu. Tap that and follow the prompts to submit your profile for review. Review here can take a few days or even a few weeks, depending on how much of a backlog Instagram has in processing those requests. Since this is a manual review, it can vary widely.
Connecting a Catalog
As mentioned above, you need to connect a catalog to Facebook so that Instagram can pull the data and use it for Shopping posts. There are two ways to connect a catalog.
The first option is to use the Facebook built-in catalog manager. You can find this here. In order to use it, you need to choose a category for your products, though I believe only eCommerce works for Instagram. Travel and Real Estate are not traditionally physical goods, they reside in their own categories. Auto might work, I haven’t tested it to find out.
You can click that link and follow the steps if you want. Since the point of this article is to discuss the third party platforms – the Facebook/Instagram Marketing Partners – who will help you manage your Instagram shopping posts, I’m skipping it.
The second option is to use a Facebook Partner. Now, I’ve seen a little disconnect here about what does and doesn’t work, so I’m going to break this up as well.
First up: the platforms that definitely work. In every help center post on either Facebook or Instagram that mentions using a third party platform, two names come up. If you’ve been reading this post with a critical eye, you’ve already seen them. They are Shopify and BigCommerce.
For Shopify
If you want to use Shopify, you obviously need to have your store set up using the Shopify platform. I’ll assume you already have your website set up and functional.
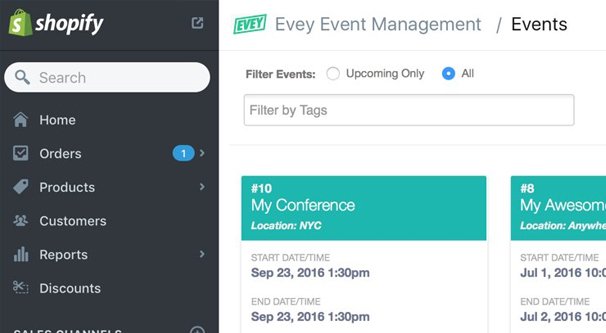
To set up Catalog integration, go to Facebook and find the Events Manager page for Shopify here. Choose your online store, and under Sales Channels, click Online Store, then Preferences. One of the options here is the Facebook Pixel ID. Plug in your Pixel ID here so Shopify can track and unify your store and their platform.
Next, click on the + next to Sales Channels and find the Facebook channel. Click to learn more, then click Add Channel. Choose Facebook, click Get Started, and then connect your account. Follow the process to authenticate and you will have linked your store and your Facebook Page.
Once your Facebook Page has your catalog linked, you can follow the process listed up above to make sure your Facebook and Instagram profiles are linked, and apply for Shopping.
For BigCommerce
If you want to use BigCommerce, you obviously need to have your store set up using the BigCommerce platform. I’ll assume you already have your website set up and functional.
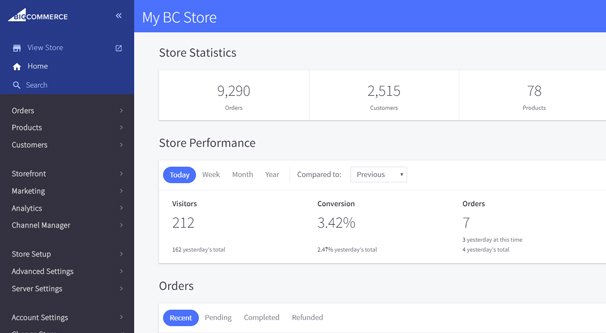
To set up Catalog integration, go to Facebook and find the Events Manager page for BigCommerce here. In the left-hand sidebar, look for Advanced Settings. Find Web Analytics and click to enable the Facebook Pixel. You’ll be asked to paste in your Facebook Pixel ID. That’s it: BigCommerce handles the rest.
Other Platforms
So, I mentioned that there’s a certain lack of clarity with regards to Instagram Shopping and Facebook Catalog integration. It all stems from this page. That’s the page for creating a catalog, and it lists the third party apps you can use to create and manage a catalog with your storefront.
As far as I can tell, the only requirement for using Instagram Shopping is to have a Facebook Catalog synced with the platform. Well, that, and the whole “comply with policies” and “only sell physical goods” things.
Instagram only lists Shopify and BigCommerce as the platforms you can use, but Facebook lists several others. So it sounds reasonable to me that if you only need a catalog on a linked Page to use Shopping, any system that can set up a Catalog can work for shopping.
Is this true or not? I don’t know. I don’t have a physical goods storefront set up on one of these platforms to try to use. If you do, and you can verify if these other platforms work or not, let me know in the comments below.
I suppose it’s possible that only Shopify and BigCommerce have the back-end infrastructure to handle orders from Instagram in whatever format they refer them, but it seems odd to me that other big platforms wouldn’t add that integration as soon as possible.
The other potential platforms that can manage a Facebook Catalog, but which might not work with Instagram Shopping, are:
The links are all to the Facebook help center instructions for setting up a Catalog using one of those systems. Again, if it works for Instagram Shopping, let me know.
Start Using Instagram Shopping
All of this has been focused on setting up Shopping, but once you’ve been approved, how do you actually use it? Luckily, it’s very easy.
The first thing you need to do is create a new post. The image needs to feature a product that you want to sell – this is why Instagram prefers physical products – and can feature up to a total of five products you want to tag. There are a lot of ways you can optimize this to maximize the visibility and attractiveness of your products.
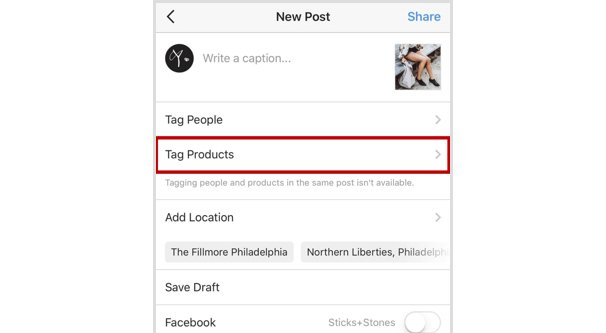
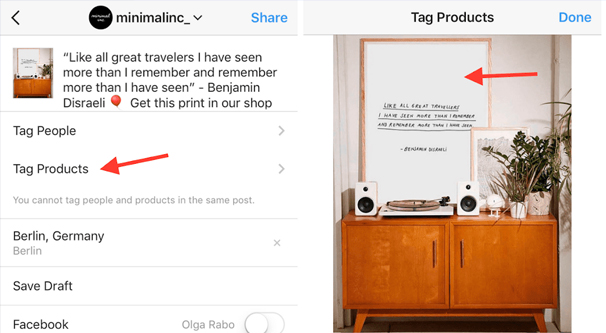
When you upload the photo and write your caption, you have all of the technical stuff you can specify. You know, picking a location, tagging people, sharing to Facebook, and so on. The option you want is Tag Products.
When you tap to tag products, you will be given a search box that is connected to your linked Catalog. Search for the name of the product you want to tag and select it. This gives you the chance to select which part of the image is that product to tag it, similar to choosing a person to tag them.
Once you’ve tagged the products and published the post, it will be live as a Shopping post. Users can tap on the products you have tagged to see prices and buy directly from the app. That’s it! You’re done.
