Instagram is a phenomenal platform for all manner of social promotion, audience engagement, and visual storytelling. The site has surpassed a billion monthly active users, and it has been steadily opening its borders, so to speak, to marketers.
There was a time where Instagram was something of a walled city, a hidden vista only mobile users could access. Over the years, dozens of different workarounds popped up, everything from mobile emulators to third party services using a literal wall of phones to manage accounts. Instagram has in part fought against this by making the site accessible to desktop users, and in part by opening their posting API to certain marketing partners.
Of course, any social network with a billion users needs to make money somehow, or the hosting costs alone would tear it to shreds in minutes. Instagram, as with most social networks, accomplishes this through advertising. Users and businesses can promote posts as advertisements, to further build audiences, awareness, and even sell products directly from the site.
Now, if you’re thinking of advertising on Instagram, there’s one thing you need to know: Instagram is owned by Facebook. Normally, this wouldn’t mean much; the sites would be self-contained. That’s not true with Instagram. Many of the back-end features, including advertising, are handled through Facebook rather than Instagram.
This makes a certain amount of sense. Facebook doesn’t feel the need to manage two different ad platforms when accounts are often shared between the two. All creation and management of Instagram advertising is handled through the Facebook ads manager.
For the purposes of this article, I’m going to assume you already have a Facebook business page and an Instagram account, but that you’re more or less a newcomer to advertising on either platform. If I’m going over something you already know, feel free to skip ahead.
Setting Up
The first thing you need to do to manage Instagram advertising is set yourself up to advertise in the first place.
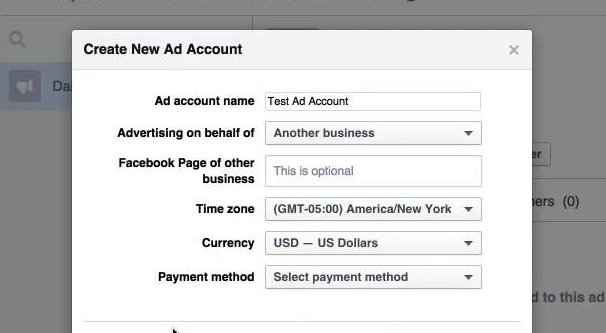
Start by going to business.facebook.com, which is the hub for Facebook and Instagram advertising. If you don’t already have a Facebook ads account, you need to create one here. Click to create an account. Add your business name and choose your primary business page on Facebook. Add in your contact information and fill out the various fields Facebook needs in order to configure your account.
If you have employees in your organization who will be assisting with advertising or handling analytics, it may be worthwhile to add them as business members with appropriate page roles. You can read about the various roles and their abilities on this page. In order to assign a specific role to a specific person, you can follow these steps.
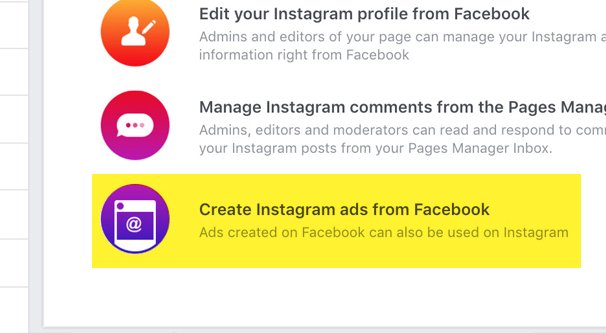
This allows you to set up and run advertising on Facebook, but what about Instagram? In order to promote your own Instagram posts, you need to link your Instagram account. First, go to your business manager, which you will find at the same business.facebook.com URL. On the left side of the interface, you should see Business Settings. Find that, and Instagram Accounts under it. Click to Claim a New Instagram Account.
You will be asked to log in to your Instagram account, typical with any app authorization. Then you will be asked to pick which ad account, or which multiple ad accounts, should be linked to this Instagram account. Pick your main ad account, the one you just made if you’ve been following along.
Creating Instagram Ads
A lot of effort can be spent on Instagram ads in between the time you create your ad account and the time you create your ads. You can, for example, do a lot of competitor research, brainstorm ad ideas, generate copy, and explore targeting options. I’m going to gloss over most of that, since there are plenty of resources available to do further reading on this blog and on others as it is.
What you need to do first is determine what objective you want for your ads. Instagram-based ads have a specific set of objectives to pick from. You can choose:
- Brand awareness, to put your ads in front of as many people who may be interested in them as possible.
- Reach, to gain as much exposure as possible without concern for conversions.
- Traffic, to generate as much throughput to your landing page as possible.
- App installs, to get users to install your app on their mobile device.
- Engagement, to ignore traffic or reach and instead focus on likes and comments.
- Video views, to get more people watching the videos you add to Instagram.
- Conversions, to get people to take action, whether that action is downloading an ebook, buying a product, or filling out a mailing list opt-in.
Keep in mind that if you want to track something like conversions or traffic to your website, you need to install the Facebook tracking pixel on your site for the data to be recorded. You may still be able to run traffic ads, but conversions at the very least need tracking so Facebook can verify when they need to bill you.
You should also be aware of the typical Facebook/Instagram ad structure. The platform uses a three-tiered system. At the bottom level you have individual ads. Ads are the smallest discrete unit of advertising; one ad has one set of targeting, one set of copy, one bidding strategy, and one budget.
Ads can be grouped into ad sets, which can have their own limitations put on them. Usually, ad sets are used as containers for ad variations used in split testing. Split testing is very important, but it’s also a semi-advanced technique used in optimization. Facebook can do some split testing automatically, and some platforms like AdEspresso can do more advanced split testing. You can also manage it on your own if you prefer.
Multiple ad sets can be grouped into one campaign. For example, if you have a Spring Sales Event going on, you can have an ad set dedicated to Instagram ads, an ad set dedicated to Facebook news feed ads, and an ad set dedicated to sidebar ads, all within the overarching Spring Sales ad campaign. This makes it very easy to adjust scheduling and budget constraints for your whole campaign simultaneously.
Ads have to be contained within sets within campaigns, but you are not forced to create multiple ads within a campaign if you don’t want to.
In the ads manager, you can create an ad either with guided creation or with quick creation. Guided creation is essentially a software wizard that guides you through what each aspect of the process is, what it means, and what is typically the best practice according to Facebook. You may or may not want to follow their advice depending on your business, your niche, and your own data. If you’re just starting out, it’s fine to use guided creation until you get the hang of what Facebook needs to run Instagram ads.

Quick creation, by the way, allows you to set up with less guidance, so you don’t have to go through all of the individual steps and learning even for elements you don’t need to use.
Your audience targeting is next. I’m not going to dig into detail about targeting here, since it’s a massive topic worthy of its own post. Instead, I’ll just refer you to another fantastic article on the subject. Eventually you will have enough data to make custom audience, which will be a great boost to your ad targeting, but when you’re first starting out you don’t have much available to you.
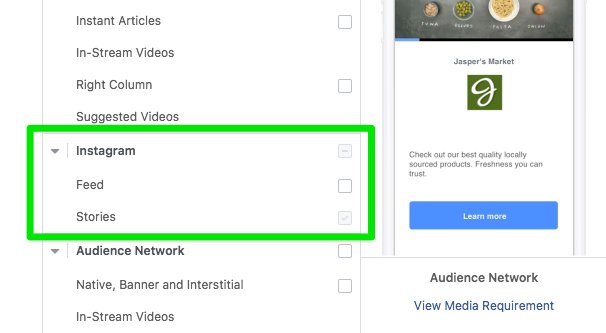
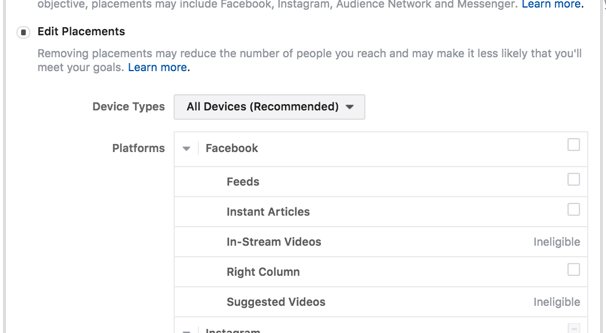
Next up, you get to choose your ad placement. Placement means where on both Facebook and Instagram you want the ad to appear. Automatic placement will put your ad on both platforms, but you can choose to limit it to just Instagram if you prefer. This can be useful if your audience on each site is tangibly different, and you want to refine and nurture it individually rather than combine the two.
Setting your budget and your ad schedule is next, and that’s not too difficult. Your budget is simply the amount of money you’re willing to spend on your promotional ad, whether it’s per day or for a lifetime cap. Bidding strategies are advanced tweaks you can make to better spend your money, but the defaults aren’t too bad as a place to start.
At this point, you’ve reached the time where you make your actual ads. The copy and images you use should fit with your branding, they should be compelling, and they should encourage users to click. There are plenty of galleries of good Instagram ads out there you can explore for ideas.
- WordStream’s top 12 best Instagram ads they’ve ever seen.
- AdEspresso’s top 55 inspiring Instagram ad examples.
- Karola Karlson’s 84 great examples of Instagram ads to learn from.
These are just a few of the myriad articles with similar lists you can find online. There’s no end to the possible inspiration you can find when you’re digging in to look at existing examples.
When making your ad, make sure to use a high quality image that fits within the dimensions Instagram recommends. If they need to compress, expand, crop, or otherwise adjust your image, it won’t look accurate for your ad and will feel more out of place. The more your ad stands out, the less likely it is to convert, regardless of your objective.
Editing, Pausing, and Cancelling Instagram Ads
Sometimes, once you start running an ad, you may decide you want to change some details or otherwise adjust the ad in some way.
Editing an ad is easy. In the Facebook Ads Manager, find the campaign that holds the ad you want to edit. You can make campaign-level edits here, or drill down into the ad set and make set-level edits there. Drill down to the specific ad to edit that ad’s settings specifically.
Once you’re in the ad you want to adjust, look for the pencil icon in the sidebar. This will open up the ad creation window with all of the information for that existing ad already filled out, because it’s the same ad.
Be aware that if you make edits to the copy of your ad, you will need to submit it for review again. Facebook is forced to review any changes in image and copy to make sure they still comply with the rules. This helps prevent people sneaking an ad through and then editing it to violate the rules.
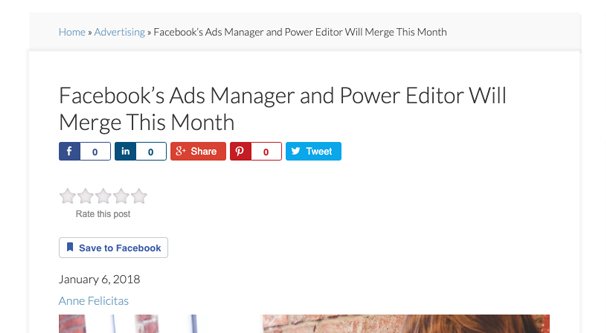
NEW! Facebook has been merging the Power Editor with the basic Ads Manager to create one unified interface that includes all of the features of Power Editor. One feature they are slowly rolling out is the Review feature. The editor panel has a “review” button with an eye icon. You can click this and it will scan your ad for any possible errors or issues. As of the time of this writing, this feature may not be available for everyone, so if you don’t see the button, don’t worry. You’ll get it eventually.
You can bulk edit multiple campaigns, ad sets, or ads by holding the shift or control keys and choosing them all at once. This allows you to do things like create, duplicate, enable, or disable ads in bulk.
If you want to make edits but would rather publish the changes later, you can choose to “close” the ad once you have made the changes, rather than publishing it immediately. This will save your changes after confirmation.
Enabling and disabling ads is very easy. All levels, the campaign, ad set, and ad levels, have a slider button next to them. When it is slid to the right and is blue, the ad is active. When it is slid to the left and gray, it is disabled. You can simply click this button to disable or enable the ad immediately.
It’s worth noting that if an ad is enabled but the ad set is disabled, the ad won’t run. The same goes for sets and campaigns. The top level setting governs the operation of the ad.
To delete an ad entirely, find the ad you want to delete and click the checkbox to select it. Then click the trash can icon in the upper bar, and it will be deleted. You will have one opportunity to confirm or cancel the deletion, after which your ad is gone.

If I edit a live Instagram ad (and publish the edits), once it’s reviewed, is the live ad supposed to reflect the changes? I’m “refreshing” the add on Instagram but even after the changes have been approved, I’m not seeing the changes reflected… And I’m unable to preview the full copy anywhere in Ads Manager so have to rely on seeing it live…